The solution to the non-working/ windows audio service is not enabled
There has been one common technical issue that has been lately bothering many Windows OS users. It is about the following – the audio service is not running. The Sound icon on the Taskbar that controls the speakers and shows a small volume slider stops functioning and gets a red X in the bottom-right corner. Also, if you place the pointer of your mouse over the same icon you will get the actual error “The Audio Service is disabled”
Running the troubleshooter will usually not be enough to fix the audio service is not running problem. Lets see some possible reasons behind it.

Most commonly, this type of an issue affects the Windows 7 and Windows 10 users, possibly because these are the most widely used versions of windows. There are also recorded cases in which this problem has affected older versions too.
Despite the fact that there appears a red X on the Sound icon, it is still possible for most of the affected users to still play audio files and to use all available speakers and headphones. Even so, the error remains and can become a nuisance.
The most usual suspect of causing such an issue is a function by the same name – Windows Audio Service. The problem may also be caused by any of its subordinate features that ensure the normal running of the Audio Service. Such a feature may just suddenly stop functioning without reason, because of a problem or simply fail to start working when the system is turned on.
A lot of users respond to the issue by just restarting their personal computers. Nevertheless, this is not a permanent solution to the problem and is not very convenient as the the audio service is not running error will reappear after some time. Fortunately, there have been established more concrete methods of dealing with this problem to block the “The Audio Service is not running” notification from appearing.
The audio service is not running – possible fixes
- TIP №1: Just try increasing or decreasing the sound volume of your machine.
Simple as it may sound, that easy method is among the most functional ones. A lot of Windows users have applied it in order to fix their problem and it has indeed worked. If you want to try this way of fixing the issue, you simply have to increase or decrease the PC volume just slightly.

You can do that in the following way:
Left-click on the Sound icon and when the volume slider is displayed. Then just adjust it as you wish by either increasing or decreasing the volume. It is as simple as it sounds.

Although this is the most simple solution to the irritating “The Audio Service is not running” alert, it might not be effective. If that is the case try the other tips below. - TIP №2: You can always restart the Windows Audio Service and its subordinate features.
Again, it may sound rather easy but by doing so and ensuring that all the three features of your machine’s Windows Audio service are adjusted to start working automatically once you turn on your system. In this way you should be able to fix the problem. You can do that in the following way:Press the Windows Key and Press R. Type services.msc in the run dialog.

What you should then do is to locate and double-click on the three aforementioned services Windows Audio service, Windows Audio Endpoint Builder service and Multimedia Class Scheduler service one by one.
Then you should adjust their Startup type to Automatic.;

2. You are supposed to restart them as well one by one by using the resulting context menus and right-clicking on the three services. Immediately after you have completed that step and restarted those features, there should not appear a red X on the Sound Icon and the “The Audio Service is not running” message should no longer be generated.
Did we help you with the audio service is not running issue? Share your feedback in the comment’s section below!


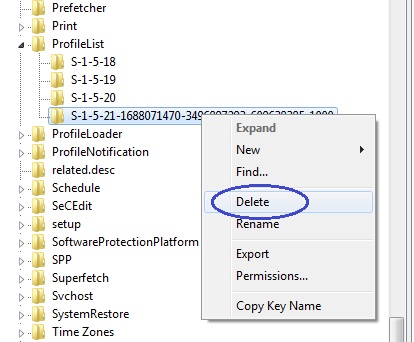
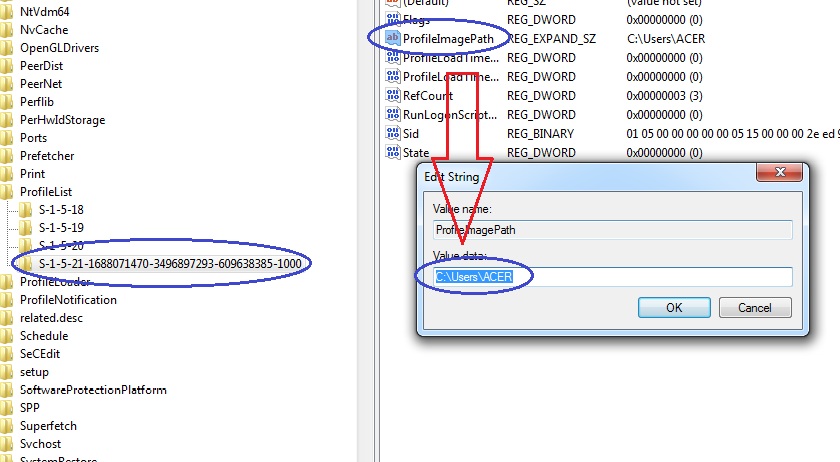 If you have two folder of the same name, one ending with .bak and the other with no extension, here’s what you need to do: